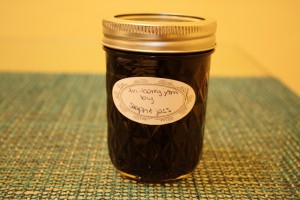
Triple Berry Jam

Summer’s coming to an end, so stock up on your berries and preserve them any way you could. Our favorite way to do this is to make jam. Though freezing is probably easier, cooking and preserving the berries is a very flavorful way to enjoy our summer produce all year long. It also makes a really nice gift!

(Berries actually freeze quite well. Make sure to clean and dry them, and then store them in a zip top bag. Make sure to suck all the air out and seal it tight so that the berries don’t get freezer burned. If you want to freeze strawberries, hull them before freezing.)

Last year we made raspberry jam with raspberries we picked ourselves from a local farm. We also made strawberry-fig jam, inspired by my backyard fig tree. This summer we decided to make more mixed fruit jams, and the apricot-nectarine turned out really orange and delicious. This raspberry-strawberry-blueberry jam is an amazing deep purplish pink color. We can’t decide if it tastes better than it looks or looks better than it tastes.

Oh, we took all the photos with my new(ish) Droid-X. Pretty cool, huh?

All jam making directions and tips are from pickyourown.org and the package of pectin.

Ingredients:

  • 10 cups of unprepared berries, we used 2 pints of blueberries, 1 1/2 pints of strawberries, and 3 (1-cup) packages of raspberries (when you mash these, you’ll have about 6 cups of fruit)
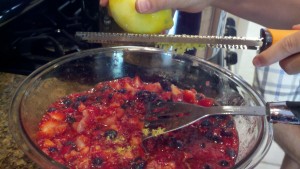
  • Juice and zest of two lemons
  • 6 cups white sugar
  • 1 package Sure Jell pectin (the yellow package)

Equipment:

  • 1 large pot
  • 2 large bowls (one for berries, one for sugar)
  • Measuring cups
  • 1 large pot
  • Potato masher
  • Mixing spoon
  • Cup of ice water and teaspoon (to test jam)

For canning:

  • Mason jars with tops and rings
  • Canning funnel
  • Magnetic lid lifter
  • Jar tongs
  • Small pot for boiling the lids
  • Pot for boiling prepared jars
  • Dishwasher or large pot for sterilizing jars

Instructions:

If you are canning, make sure to sterilize the jars. If using a dishwasher, run it without soap. If using a pot, fill the pot with water and the jars and boil. Do not touch the inside of the jars (that’s why you have the jar tongs), because that will introduce bacteria to the sterilized jars and could result in icky jam! Do this now so it will be ready when you are. Boil the lids, too.

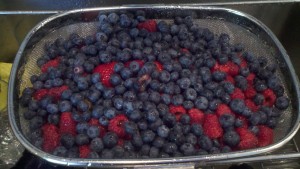
1. Wash the fruit. Sort through it to make sure you have no bad berries or stems, etc.

2. Chop the strawberries.

3. Add the fruit to a bowl and make sure you have 10 cups. Mash.

4. Measure out the sugar. Set aside 1/4 cup of sugar and mix with the pectin. This will allow the pectin to incorporate into the fruit better, and make sure you don’t have lumpy jam.

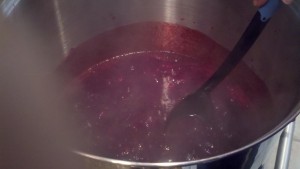
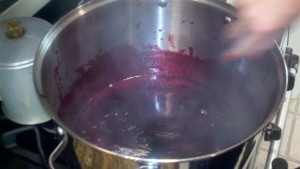
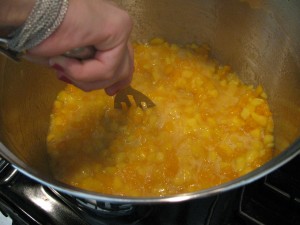
5. Add fruit to large pot and cook over high heat, stirring constantly. When it comes to a full rolling boiling, meaning it doesn’t stop bubbling even when you stir, time one minute. Add the pectin and stir until it dissolves.

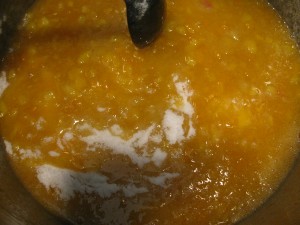
6. While still stirring, add the sugar, a cupful at a time, until it is all incorporated.

7. Continue stirring constantly until the mixture comes to a rolling boil again. After one minute, test the jam to make sure it sets.

8. Take a spoonful of jam and dip it in a cup of ice water. If it gels, it’s ready to be jarred. If not, boil for another minute and test again.

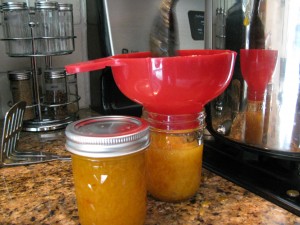
9. Use a ladle or big spoon to fill the sterilized jars. Leave about 1/2 inch of space at the top.

10. Use the magnetic lid lifter to cover, making sure to clean the jars before placing the tops on. Screw on the lid.

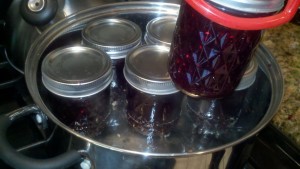
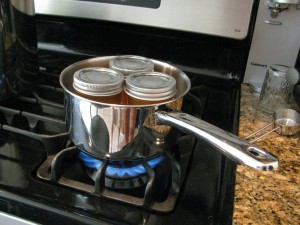
11. After all the jam is canned, place in about 2 inches of water and boil for 5 minutes (or more, depending on altitude). You will hear the tops POP, either while they are boiling or after when they are cooling. If you don’t hear the pop after a while, try boiling again or just put the jam in the fridge and use it right away. It will still be good.

12. The boiled jars should last about a year (’til next summer).

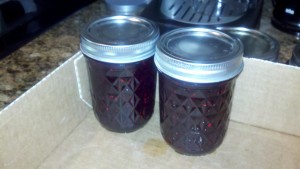
This recipe made 10 6-oz jars of jam.

Nectarine-Apricot Jam

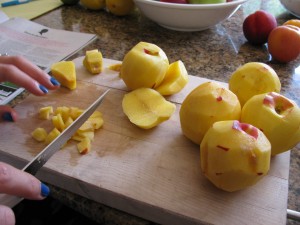
Summertime means it’s time to preserve the sweetest and best tasting fruits to enjoy during the winter months. We made this during the peak fruit season and sold them at a local bake sale (we weren’t able to attend, but we heard they sold out fast! Did you buy one? What did you think?, but we’ve neglected to share it with you until now. Sorry about that, the pictures had been hiding somewhere, but we uncovered them on Adele’s camera. (You remember Adele, right?)

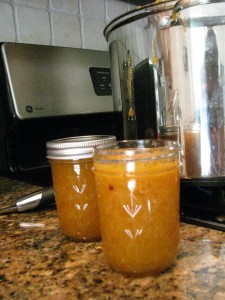
Ooh, so this was when I impulsively bought a bottle of blue nail polish on a trip to Duane Reade. You can see it in the corner of this picture; cool, huh:

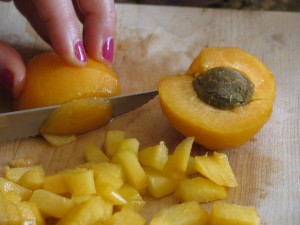
This was our first time making jam with stone fruits, and it was a bit different than the raspberry and fig-strawberry kinds. First of all, there was a lot more chopping involved, and most importantly, it yielded a lot less jam; we only ended up with five jars.

Nectarine-Apricot Jam

Ingredients:

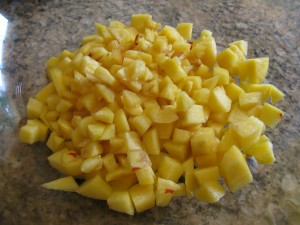
  • 5 cups of cubed apricots
  • 5 cups cubed nectarine
  • 5 cups of sugar
  • 1 package of pectin

Directions:

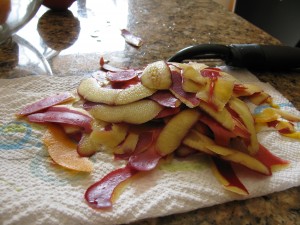
  1. Wash, fry, and cube the fruit.
  2. Sterilize the jars (we use the dishwasher, without soap) and the lids (we put them in a pot of water on the stove, but don’t let them boil).
  3. Cook all of the fruit in a large pot over high heat. Stir, stir, stir!
  4. Mix 1/4 cup of sugar with the pectin and add to the sugar. Stir some more, until the mixture comes to a boil. And then keep on stirring until you can’t stir away the boil for a whole minute!
  5. Add the rest of the sugar and continue stirring until it comes back to a boil. And that’s it, you’ve made jam.
  6. Just to make sure it jammed, test it: dip a teaspoon into the jam and then dip it into a bowl of ice water. Did it turn into a gel? If so, you’re good. If not, boil some more.
  7. Now you’re ready to preserve! Fill the jars with jam using a jar funnel. Use a magnetic jar top picker up-er to lift the lids and place them on top of the jars. Then screw the rings on.
  8. When all of your jars are filled and you’re out of jam, fill a pot with about 2 inches of water and boil the jam jars in there for 5 minutes. You’ll hear the lids pop! And now you have sterile jam. Wasn’t that fun!?
  9. This will keep for about a year in the pantry. Refrigerate after opening.

Leek Ejjeh + Happy New Year

Chag Sameach everyone! We hope everyone has a sweet and healthy new year.

Everyone knows the custom of dipping apples in honey for Rosh HaShanah…actually, our family has different customs (and we don’t even have honey at the table, we use sugar instead). The Sephardic custom is to make many brachot on simanim, the symbolic foods we eat during the seder, before the meal. Before sharing the Leek Ejjeh recipe with you, I thought I might explain what our holiday meal with consist of tonight, and share the simanim that we will eat in order to celebrate the new year. Some more information on a (somewhat different) Rosh HaShanah seder can be found here.

The first siman is apples dipped in sugar (or honey). We eat this so that we will have a good and sweet new year. Cut the apples and serve with a bowl of sugar. Done.

The mext is tamarim, or dates. We eat this so that our enemies may be destroyed. No need to prepare these, we just buy dried dates – medjool dates are quite tasty on their own.

The third siman is leeks. We eat these so that our enemies will be destroyed (again). The recipe for leeks is at the bottom of this post – thanks for your patience!

The fourth siman, swiss chard, is eaten in hopes of removing our enemies (yet again).

The fifth siman is gourd. We make a bracha asking God to tear up any oppressive decrees in areas where Jews live and to proclaim our merits before Him.

The next siman is black eyed peas, or Lubiyeh. We eat this in order to increase our merits. These small beans are eaten stewed with meat – our family uses kibbe (the same little meatballs I made with mushrooms the other day) – and served as part of the regular meal and the seder during the holiday meal.

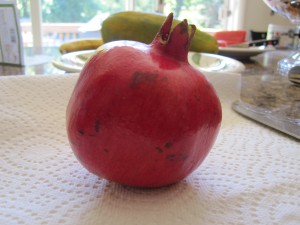
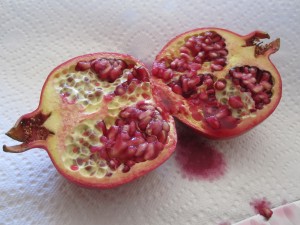
We eat the next siman, pomegranates (or rimon), asking God to grant us bountiful merits and goodwill, as many as the fruit’s seeds. Cut the fruit in half and immerse in a bowl of water while scraping the seeds away from the flesh with your fingers. The white flesh will float to the top, and the seeds will sink to the bottom. Scrape the flesh from top of the bowl and drain the seeds, it’s as easy as that. This method also stops your kitchen and clothing from getting all red.

Lastly, we eat tongue as the next siman. Tongue is eaten to symbolize a lamb’s head (I think some families eat fish, as well). This is to symbolize that we will be leaders (at the head) rather than followers at the trail. The meat is also a reminder of the ram that Avraham sacrificed instead of his son, Yitzchak. We buy tongue from the deli. Most people at the table don’t want to eat it.

The last thing we eat, after the simanim, is a new fruit. This should be a fruit that has just come into season, and therefore we were unable to eat for an entire year. We say Shehechianu on this fruit and thank God for keeping us alive and bringing us to this season. Our family usually eats starfruit or dragon fruit.

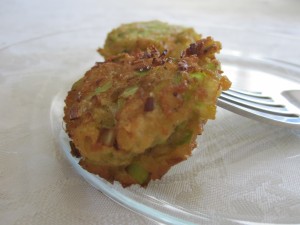
And without further ado, the leek ejjeh we will be enjoying for the next two nights:

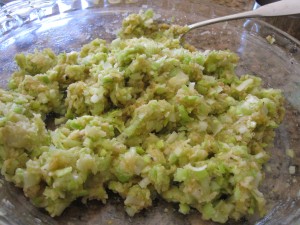
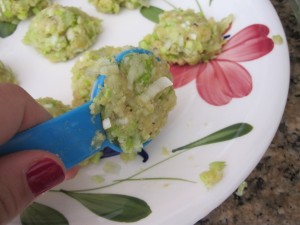
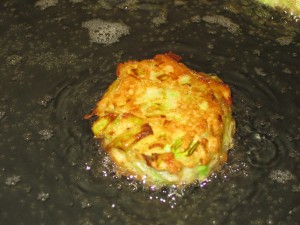
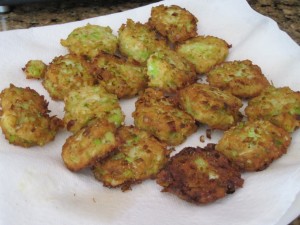
We actually make our leeks into small latkes, quite similar to the tasty Chanukah treat. They’re delicious this way – crispy, tasty, and small. Not breaded like onion rings, but with the same flavor. They taste somewhat similar, actually.

Ingredients:

  • 2-3 large leeks, or 4-5 small leeks, washed well and chopped (don’t try to grate them on a box grater. They will get stringy)
  • 1/2 cup breadcrumbs or matzah meal
  • 2 eggs
  • Egg white from one egg
  • Salt and pepper
  • Vegetable oil, for frying

Directions:

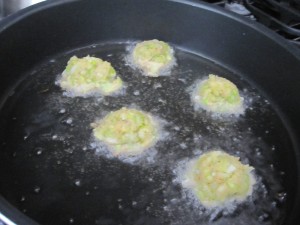
1. Prepare oil for frying: pour about 1/2 inch of oil into a high-walled pan. Place on burner over medium heat.

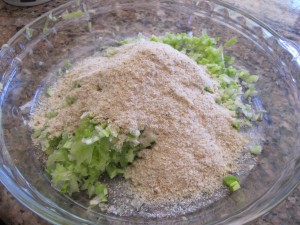
2. Combine leeks, eggs, and breadcrumbs. Mix to combine. Check consistency. If it’s too dry, add the egg white. If too wet, add more bread crumbs. The batter should be loose but be able to come together into a ball if squeezed. Add salt and pepper.

3. Using a tablespoon measure, scoop out batter into balls.

4. Test the frying oil with a tiny amount of batter. Make sure it sizzles but doesn’t burn. Prepare a plate or tray to drain the patties after frying. I used a paper towel-lined plate. My grandmother used to use brown paper bags (yes, the ones from the grocery store). Alton brown uses a cooling rack on top of a towel-lined cookie sheet. That’s probably the best idea if you can do it.

5. Using a slotted spoon, drop the batter, one at a time, into the oil, flattening into patties as you drop them. Only put 5-4 in the oil at a time, because you don’t want the temperature to drop too much and the patties to get soggy.

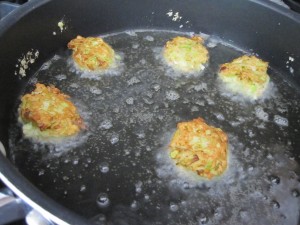
6. After one minute, they should be brown. Flip the patties. Fry on the other side for a minute. Remove from oil with slotted spoon and place on draining plate. Repeat until all are fried.

7. Sprinkle with salt when still warm.

8. Serve along with the bracha: “that those who hate us be cut away”

Shana tova!

Meatless Monday: Roasted Corn Salad

Summer corn is here! That means that we eat lots of corn and get it stuck in our teeth. Yuck! This corn salad is a better way to eat that same corn without getting anything stuck in your teeth!

This recipe has quite a few steps, but ones that you can skip and have the store do for you, like roasting peppers and shucking corn. I did it all myself, but no one will know if you buy roasted peppers and use canned or frozen corn that you just roast in the oven for a while. Actually, what a great way to make this recipe in the winter when fresh corn isn’t available. As long as you don’t skimp on the fresh cilantro, I won’t tell anyone.

The flavors just get better when this sits, so make this ahead of time. Having company? Make it the day before and let it sit in the fridge. It’ll make your life much easier and it will make the salad taste better. I was going to add some black beans to this, but didn’t have any in the pantry. Turns out, I think it was perfect this way, but add the beans if you want to (a great Meatless Monday way to get some protein). Then let me know how it is. Maybe I’ll add those next time.


Ingredients:

  • 3 ears white corn
  • 1 red pepper
  • 1 shallot, chopped
  • Salt and pepper
  • Chili powder
  • About 1 tablespoon chopped cilantro.

Directions:

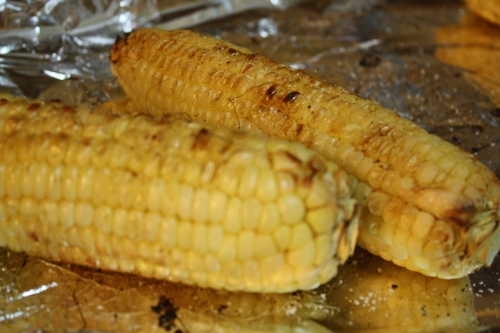
1. Season the corn with salt, pepper, and chili powder. Roast or grill the corn for about 15 minutes. Let cool.

2. Roast the red pepper over an open fire, rotating when the skin is black. When blackened, place in plastic bag and let steam for about ten minutes. Remove from bag, peel the black skin off, and cut into strips. Cut the strips into small pieces (about the same size as the shallots).

3. Combine the shallots, roasted peppers, salt, pepper, chili powder, and cilantro in a bowl.

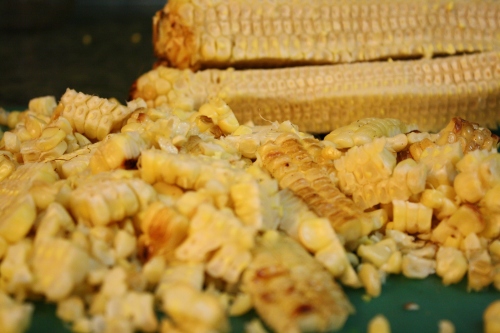
4. Remove the corn kernels from the cob – using a sharp knife, hold the corn so that it is standing, and cut downwards. Don’t worry about all the kernels separating from each other, that’s part of the fun of homemade corn salad!

5. Add the corn to the bowl, and mix well. Add salt and pepper to taste. If you like cilantro as much as I do, add more!

See the bowl I used? It’s my favorite! I have it in three sizes. They make it in red, too, but I haven’t seen it since Adelaide’s closed.

Mustard Greens Recipe With Cumin and Balsamic

As those of you who follow us on Facebook and Twitter know, I have been picking up fresh veggies from a local, organic farm via CSA. I had no idea what to do when I got mustard greens and mizuna (I don’t like mustard! I had never even heard of mizuna!), so I consulted the always-reliable internet and found this recipe on epicurious.

Continue reading

Syrian Style String Beans with Tomato

Lucky me, I picked up some string beans from my CSA yesterday, and now I know what I’m going to break my fast on tonight! They’re just what I need after a full 25 hours of not eating; a light dinner (and a lot of fluids) instead of a feast that will make me feel sick afterwords.

We’ve showed you how we make Asian-style string beans, but these are more true to our heritage: Syrian-style! They’re almost as easy to make, and have just a bit more ingredients. Sometimes we like to eat them with rice for a light dinner, but they really work best as a side dish where the protein is the star of the meal (you may recognize that we made them to serve with lamb chops once).

Continue reading

Mejadra, or Rice and Lentils

*

It is customary to eat lentils in a time of mourning, based on the food that Yaakov cooked when Avraham died. (Another customary mourning meal is a hardboiled egg with a loaf of bread, which symbolizes the circle of life.)

Rice and lentils is a popular Syrian dish. It’s often served as a weeknight meal along with jibben or a light fish, but that’s not why we’re posting it now; it is a one-pot meal and is it’s our custom to eat this on the night before Tisha b’Av (which is tomorrow!). Serve it with some plain yogurt and you have a pretty balanced (and simple) one-pot meal. Serve it alongside a million other dishes, like pizza, jibben, salad, knishes, sambusak, etc, and you have yourself a typical Syrian dairy meal. Continue reading

Lentils

Lentils are boring. I think the only way I’ve ever even eaten lentils is in soup (and that’s the red variety, the kind that Esav traded his birthright for) and in rice and lentils. But when Ina made her salmon with lentils and everyone about the lentils on the bottom, I knew I should try it. Continue reading

Meatless Mondays: Lime Coleslaw

Here is a meatless and satisfying side dish for Meatless Monday:

Okay, okay. I know it’s still Sunday! But you have to make this ahead of time to let the flavors really set, so make this tonight before going to bed and eat it with dinner tomorrow!

I had some leftover cabbage and limes from our Pad Thai dinner, so I obviously had to make coleslaw. It’s easy to make, requires no cooking, and is barely any cleaning to do once you’re finished. The result is a crisp, refreshing, and delicious take on coleslaw.

Continue reading

Shavuot Recipe Roundup

Shavuot is distinct from most other holidays because we traditionally eat dairy (why?). This means that we can eat gooey cheesey dinners, and more importantly, we don’t have to make desserts using fake butter like we usually do!! So we always pick out some special recipes to share with our family during this holiday.

Continue reading